A beautifully restored Mk2 Jaguar can look flat and lifeless in a rushed mobile phone snap, while a humble Morris Minor can look sensational with the right light and angle. That is the difference when you learn how to photograph classic cars with intent rather than simply pointing a lens at something you already love.
Classic cars reward patience. Their appeal lives in the details – the sweep of a wing, the gleam of chrome, the shape of a grille, the character in worn leather and polished wood. Photographing them well is not about making them look modern. It is about showing why they still stop people in their tracks at a show field, outside a country house, or lined up on club display.
How to photograph classic cars at shows
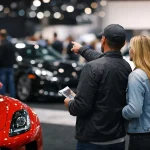
Motor shows are one of the best places to practise, but they also create the biggest challenges. You rarely get a clear background, the light changes all day, and there is usually a crowd gathering just as you find your angle.
Start by walking around the car before you take a single shot. Look at how the body lines catch the light and where distracting elements sit behind it. A lovely Rover P5 can be ruined by a fluorescent burger van in the background. If the rear three-quarter view has cleaner surroundings than the front, use it. You are not documenting every panel for an auction catalogue. You are trying to create a strong image.
Arrive early if you can. Morning light is usually softer, reflections are easier to manage, and the public has not yet filled every gap around the display. Late afternoon can be just as good, especially when the lower sun brings shape and warmth to paintwork. Harsh midday sun is the trickiest time. It can bleach lighter colours, create ugly hot spots on chrome and throw dark shadows under arches and bumpers.
At a live event, patience matters as much as camera settings. Wait a few extra seconds for people to move through the frame. Shift half a step left to hide a modern hatchback parked behind a 1960s saloon. Small changes make a big difference.
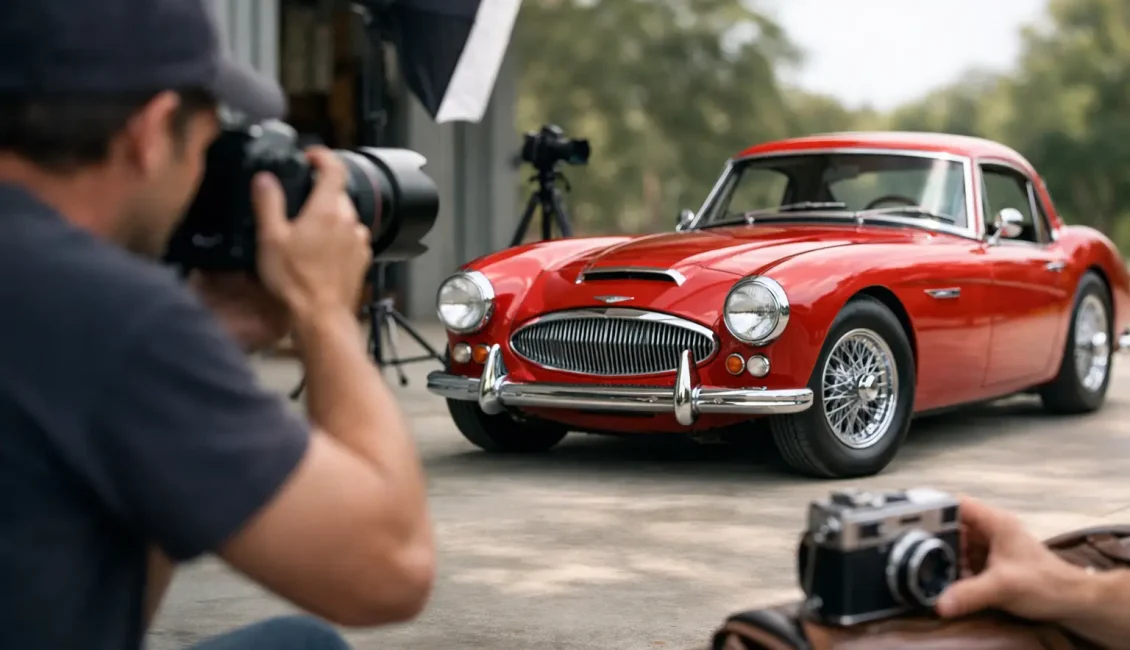
Get the angles right
The biggest mistake beginners make is shooting everything from standing height. That works for very little in classic car photography. Most cars look better when you lower the camera to roughly headlight height or slightly below. This gives the car more presence and shows off its proportions properly.
Front three-quarter and rear three-quarter angles are usually the safest place to begin. They show shape, stance and detail in one frame. Side-on shots can work brilliantly for long-bonnet GT cars and elegant saloons, but they need clean backgrounds and careful composition. Straight-on front shots suit cars with strong faces – classic Minis, American muscle, old Land Rovers, big chrome-laden cruisers – yet they can look static if the light is poor.
Do not ignore the less obvious views. A close shot down the line of a wing, a low angle on wire wheels, or a framed view through an open side window can often say more than another standard full-car image. The trick is variety. If every image is taken from the same standing position, even a stunning collection starts to look repetitive.
Light is everything
If you only improve one thing, improve your understanding of light. It decides whether the paint glows or looks dull, whether curves stand out or disappear, and whether chrome adds sparkle or turns into a blown-out distraction.
Overcast days are often excellent for classic cars. That might not sound glamorous, but cloud acts like a giant softbox. Reflections become smoother, colours stay richer and you can photograph detail without fighting harsh contrast. Dark green, navy and burgundy paint in particular often looks better under soft skies than in brutal sunshine.
Bright sun can still work, especially early or late in the day. Use it to create shape, not glare. Try keeping the sun slightly behind the car for a rim of light along the roofline and wings, then expose carefully so the bodywork still holds detail. If the reflections are too strong, move. Polarising filters can help cut glare on glass and paint, but they are not magic. Sometimes they improve a windscreen and sometimes they make one part of the car look oddly uneven. Check the result, do not assume.
Indoor halls and covered display areas bring a different challenge. Mixed lighting can leave paintwork looking strange and yellow. In that setting, it is often better to embrace detail shots rather than force a full-car photo in poor light.
Camera settings that actually help
You do not need expensive gear to get strong results. A decent mobile phone, mirrorless camera or DSLR can all do the job if you use them thoughtfully. Technique matters more than badge names.
For full-car shots, a moderate focal length is usually your friend. Something around 35mm to 85mm full-frame equivalent keeps proportions looking natural. Go too wide and the car starts to distort, with stretched bumpers and exaggerated panels. That can be fun for dramatic effect, but it is rarely flattering for heritage cars.
Use a fairly wide aperture if you want to separate the car from a busy background, but not so wide that parts of the vehicle fall soft. Around f/4 to f/8 is a useful range for many static shots. If you are photographing badges, interiors or ornaments, go wider if you want a shallower background blur.
Keep shutter speed high enough to stay sharp, especially if you are handholding in low light. Image stabilisation helps, but it will not rescue every shaky shot. If you are using a mobile phone, tap to set focus on the key part of the car and reduce exposure slightly if bright chrome is clipping.
Show the details that make the car special
The best classic car galleries are not just rows of whole vehicles. They capture craftsmanship and personality. Bonnet mascots, coachlines, timber dashboards, period switches, stitched seats, patina on a gear knob, a maker’s plaque under the bonnet – this is where a classic car feels alive.
Think about what makes that particular car worth photographing. Is it concours-perfect? Then show the finish and precision. Is it original and slightly weathered? Then lean into the authenticity. A bit of age, a stone chip, sun-softened paint or creased leather can add far more character than over-polished perfection.
Owners notice when photographers understand this. If someone has brought their pride and joy to an event, they will appreciate images that go beyond the obvious. A few respectful detail shots often tell a richer story than twenty almost identical full-body frames.
Backgrounds can make or ruin the shot
Classic cars sit naturally in the right surroundings. Heritage venues, gravel drives, formal gardens, old brickwork and tree-lined approaches all add atmosphere. That is one reason event locations matter so much. A great car in a fitting setting always has more presence.
If you are photographing at a public show, use depth and framing to simplify the background. Shoot through a gap between other cars. Position yourself so hedges or buildings sit behind the vehicle instead of modern signage. Get lower to lose clutter, or move tighter for a cleaner crop. There is no rule saying every shot must show the whole scene.
Be careful with reflections too. Highly polished classic cars mirror everything around them, including you, nearby spectators, bright gazebos and rows of plastic bins. Before pressing the shutter, scan the bodywork itself. Often the distraction is not behind the car but on it.
People, movement and atmosphere
A static display shot is useful, but atmosphere matters as well. Classic car culture is about more than sheet metal. It is about crowds gathering around a rare shape, owners chatting beside open bonnets, and children seeing a car they know only from old films or family stories.
Including people can make an image feel more real, provided they add to the frame rather than distract from it. An owner polishing a wing, a judge inspecting details, or visitors admiring a line of cars can give scale and context. If you want the car to remain the hero, place people at the edge of the composition rather than dead centre.
If the car is moving – perhaps entering an arena or rolling through a showground – try panning. Track the car as it passes and use a slower shutter speed to blur the background while keeping the body sharp. It takes practice, and plenty of frames will fail, but when it works it gives life that a parked shot never can.
Edit with a light touch
Post-processing should improve a good image, not rescue a careless one. Adjust exposure, contrast and white balance so the car looks true to life. Lift shadows if needed, but do not flatten everything. Classic cars suit richness and depth.
Resist the temptation to oversaturate paint or push clarity until chrome looks brittle. If you are photographing a 1950s saloon, it should still look like a 1950s saloon, not a computer-generated toy. A light crop, a tidy horizon and a few careful tonal tweaks are usually enough.
Whether you are shooting on a show field, outside a grand venue or on a quiet Sunday morning with your own pride and joy, the real trick is slowing down enough to notice what makes the car worth photographing in the first place. Get that right, and the image will carry some of the same presence the car has in person.